How to Plant Azalea Bushes for Maximum Growth
Planting an azalea is like investing in a burst of joy for future springs. It adds a dynamic splash of color to your garden. However, azalea requires the best start to display its lovely hues.
Knowing how to plant azalea bushes can help you get this spring-blooming shrub off to a good start. These perennial flowering bushes are quite easy to grow. With proper care, Azalea plants will grace your garden bed year after year.
The secret to effectively planting azalea bushes is choosing the right time and location and providing proper care. This article includes a step-by-step guide to successfully planting azalea bushes. Keep reading!
Where’s the Best Place to Plant an Azalea?
The first step to ensuring the healthy growth of this flowering shrub is choosing where to plant the azalea bush. Azalea is typically considered an understory plant. They thrive well in a location with partial shade or dappled shade.
Excess direct sunlight can damage the plant. If they don’t get enough sunlight, they may not bloom. So, there should be a mix of sun and shade. The best place to plant azalea bushes is a location with filtered sunlight or a high canopy of trees.
Ideally, they should get a little bit of morning sun and protection from the harsh afternoon sun. Choose a site with well-draining, acidic soil. Make sure the soil retains moisture without being waterlogged.
What is the Best Month to Plant Azalea?
Azaleas are popularly grown in the southeastern US. They thrive well with mild winters and long summers. So, when to plant azalea bushes? The best time to plant azalea bushes depends on the climate of the area where you are growing them.
Generally, the ideal month for planting azalea bushes is in the late spring or early fall. Planting in spring allows the azalea plants to establish themselves before winter. If you plant in the spring, make sure to mulch well and water throughout the summer.
When you plant in early fall, it gets enough time to root before the summer heat. In most regions, fall is the ideal time, especially in areas with mild winters. This allows a strong root system to develop without summer heat stress.
Do Azaleas Grow Better in Pots or the Ground?
Azaleas grow best in a semi-shaded bed in the garden. But can you plant an azalea bush in a pot? Yes, they also thrive well in pots. However, both options have their benefits and drawbacks. The best option sometimes depends on specific conditions and care requirements.
Azaleas in Pots
When you plant azaleas in pots, you get better control over soil conditions and moisture levels. Acid-loving varieties of azalea plants are a good choice for planting in pots. You can move potted azaleas to different locations to control light exposure.
Also, you can protect potted azaleas from harsh weather. You can move them indoors in areas with harsh winters. If you have no dedicated garden space, you can keep potted azaleas on patios, balconies, etc.
However, soils in the pots tend to dry more quickly. You need to water potted azalea flowers more frequently, especially during hot weather. Pots can restrict root growth. It ultimately limits the size of the plant and the number of blooms.
The temperature in the pots may often fluctuate, which makes the roots vulnerable to extreme weather. Though there are some limitations to planting azaleas in pots, potted azaleas can last for many years with proper care.
Azaleas on the Ground
Azaleas in the ground get a stable environment to spread their roots and flourish over time. Ground-planted azaleas grow vigorously in areas with naturally acidic soil and enough drainage.
They require less frequent watering when planted in the ground. Besides, the ground includes natural fertilizer and beneficial insects, which help azaleas grow well. Ground soil provides better insulation and protects the roots from severe temperatures.
Azalea may not thrive if you live in an area with acidic, well-draining soil. If the ground-planted azaleas in your garden do not thrive, you cannot move them to different locations.
Problems with Azaleas in Pots
Growing azaleas in pots can be a rewarding experience. At the same time, it imposes unique challenges. Let’s shed some light on them.
Azaleas thrive well in acidic, well-draining soil that is high in organic matter. Hence, the soil tends to dry more quickly and requires frequent watering. Azaleas can rot in poorly drained soil if the pot has poor drainage.
Azaleas become root-bound in the pot. Their root grows densely in the pot. The limited soil in the pot stunts the plant’s growth and minimizes blooming. Nutrients in the potted soil can be depleted quickly.
The nutrient deficiencies in the soil affect the plant’s growth and blooming. This sometimes results in chlorosis (yellowing leaves). The temperature in the pots tends to change more frequently than in-ground soil.
In hot weather, the potting soil overheats. Similarly, in cold weather, the soil becomes exposed to freezing. Both conditions can damage the roots. Lastly, the pH level in the potting soil can change more rapidly. Since azaleas are acidic soil-loving plants, a pH imbalance can lead to nutrient deficiencies.
Do Azaleas Need Full Sun?
No. Azalea prefers a little shade and a little sun to thrive. Most azalea varieties bloom well in partial shade. They require a mix of sunlight and shade throughout the day. In particular, they do well in morning sun and afternoon shade.
Azaleas are considered naturally understory plants. They often thrive under the canopy of taller trees in their natural habitat. It makes them well-suited to areas with filtered or dappled light, such as woodland gardens.
However, some varieties of azaleas, specifically the deciduous types, can tolerate and even flourish in full sun. They can withstand full sun in cooler climates. In warmer climates, they can suffer leaf scorch, wilting, etc.
How to Plant Azalea in The Ground?
Azaleas are hardy plants that can survive adverse growing conditions. They can thrive with little care, but they have specific soil, light, and water requirements. Hence, planting them in the ground requires careful preparation.
Here is a step-by-step guide to successfully planting azaleas in the ground.
Step 1: Choose the Right Location
Like other garden bloomers, azalea has specific needs for growth. They prefer partial shade or dappled shade. Choose a spot where you get morning sun and afternoon shade. You can consider a place under the canopy of taller trees. Make sure the spot is protected from strong winds.
Step 2: Test and Prepare the Soil
Azaleas grow in well-draining, acidic soil. They cannot withstand heavy, clayey or alkaline soils well. Before planting the azalea, test the soil and make sure it has a pH between 4.5 and 6. If the soil is too alkaline, adjust it with sulfur to lower the pH.
Step 3: Dig the Hole
Dig a hole twice as wide as Azalea’s root ball but not deeper. How deep to plant azalea bushes? Azaleas have shallow root systems. Planting them too deeply can cause root rot. So, dig as deep as the size of the plant’s root ball.
Step 4: Place the Azalea in the Hole
Carefully remove the azalea bushes from their container. If the roots are tightly bound, gently separate them to encourage outward growth. Do not place the plant in the hole. Make sure the root ball is 4 inches above the surrounding soil.
Step 5: Backfill the Hole
Backfill the hole with the sole you removed earlier. Firmly and gently press the soil around the azalea roots to remove the air pocket. Make sure the top of the root ball is not covered.
Step 6: Mulch Around the Plant
Apply a 2-3-inch layer of organic mulch around the plant. It helps to hold moisture in, maintain soil temperature, and suppress weeds. Also, it keeps the loose soil around the root ball from washing away.
Step 7: Water the Azalea
Water the plant regularly, particularly during dry spells. It is essential to keep the soil consistently moist but not waterlogged. Keep the soil moist for the first few weeks and water every couple of days.
How to Plant Azalea in Pots?
If you have limited garden space, pots give you a versatile option to plant azaleas. You can enjoy their beauty up close by keeping the potted azaleas anywhere. Besides, it gives you control over soil conditions.
Follow the steps below to plant your azaleas in pots successfully.
Step 1: Choose the Right Pot
Choose a container that is twice the width of the azalea’s root ball and as deep as necessary to give the plant enough room to grow. If it is too small, it will limit the plant’s growth. Also, choose a pot made of ceramic or terracotta.
These materials are ideal for potted azaleas due to their breathability. Make sure the pot has a drainage hole at the bottom. This prevents waterlogging and root rot.
Step 2: Prepare the Soil
Azaleas thrive well in acidic, well-draining soil. Use a high-quality potting mix designed for azaleas or other acid-loving plants. You can also prepare the soil by combining equal parts of peat moss, coarse sand, and pine bark.
Check the pH level of the soil. It should be between 4.5 and 6 for optimal azalea growth. Place a layer of small rocks at the bottom before adding the soil. It helps to improve drainage.
Step 3: Select a Pot-friendly Azalea Variety
Choose a dwarf or pot-friendly azalea variety. Dwarf Encore azaleas are a popular choice for pots. This variety grows more slowly than its taller variety. They mature around 2 to 3 feet tall and 3 to 4 feet wide. Kurume hybrid is another variety you can consider for pots.
Step 4: Pick the Right Location
Azaleas thrive well in slightly shady spots, whether it’s in pots or in the ground. Choose a place that is exposed to the morning sun but protected from midday rays.
Note that they won’t survive if they are kept in complete shade or direct sunlight. You’d better find a dappled, shady space. Moreover, azaleas need protection from harsh winters. The plus point of having potted azaleas is that you can bring them inside during harsh winters.
Step 5: Plant the Azalea
Carefully remove the azalea from its nursery container. Check the condition of the root ball. If the plant has tough roots bound around it, gently loosen it up. Make 2-inch deep vertical cuts using a knife around the root ball.
Gently pull the azalea roots outward. Now, put the plant in the centre of the pot. Make sure the top of the azalea root ball is a bit above or level with the soil surface. Do not plant it too deep. It can suffocate the roots.
Now, backfill around the root ball with more potting mix. Press down the soil gently to remove air pockets. Azalea prefers loose and airy soil. So, do not squeeze the soil too tightly.
Step 6: Maintenance
After planting azaleas in the pot, you must water them immediately. It helps settle the soil and remove any air pockets. Then, water it every day for the next few days. After the initial few days, water once or twice a week.
How to Plant Azalea from Cuttings?
Do you want to expand your garden with more of these beautiful azalea bushes? If so, propagating azaleas from cuttings is the way to do so. Here is the step-by-step guide to planting azaleas from cuttings.
Step 1: Choose the Right Time
The best time to cut azaleas for propagation is in late spring to early summer. By this time, azaleas had finished blooming, and the new growth had begun to mature. This new yet semi-hard growth is called “softwood.”
Step 2: Choose the Cuttings
Choose a healthy, disease-free, non-flowering shoot. The shoot should be about 4 to 6 inches long and firm but still flexible. That is, they are not too green and not fully woody.
Step 3: Prepare Cutting
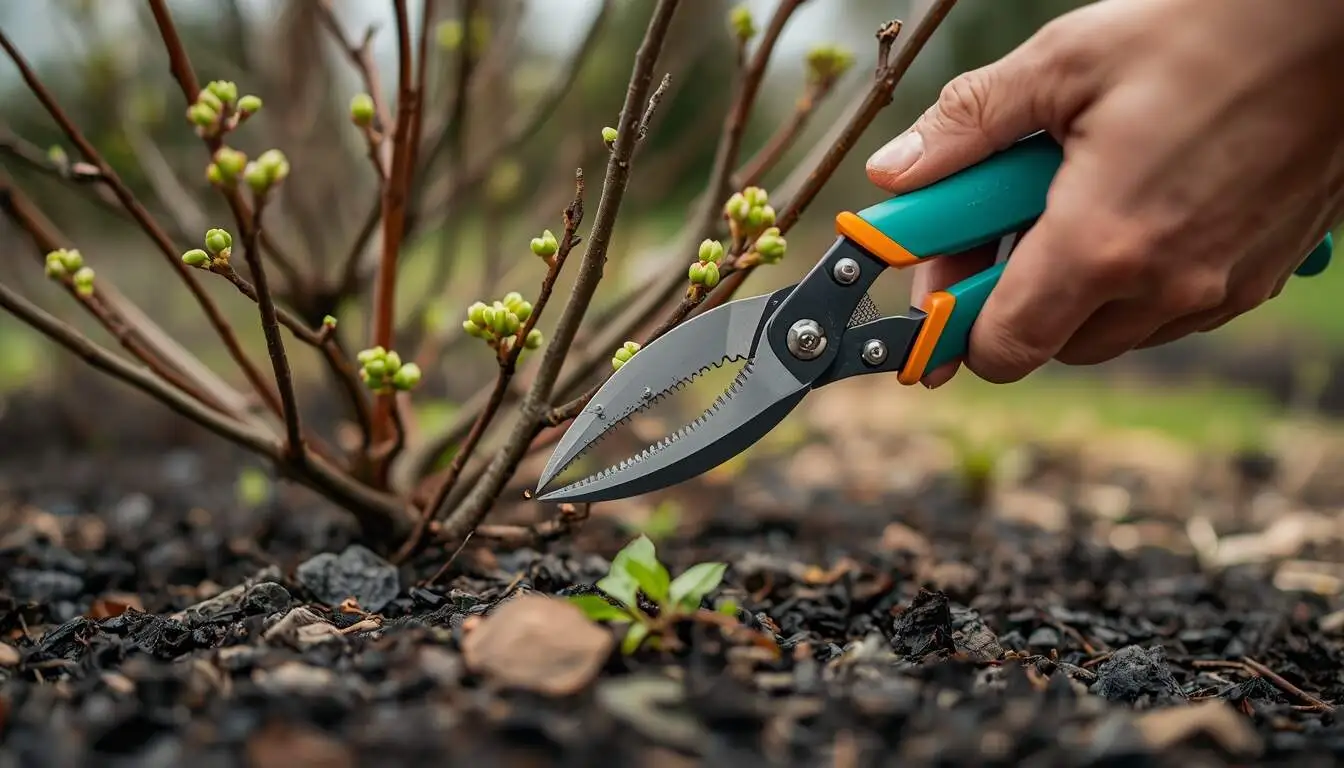
Strip the leaves from the lower half of the cut. This trimming helps to minimize water loss and encourage root development. Cut a 4-6-inch piece from the tip of the branch using a sharp knife. Now, dip the cut end of the cutting into a rooting hormone gel or powder.
Step 4: Planting the Azalea Cutting
Fill a pot with an acidic, well-draining potting mix. Make a small hole using a pencil in the potting mix. Insert the azalea cutting into the hole. Make sure to cover the cut end with potting mix. Gently firm the soil around the cut.
Step 5: Maintenance
Cover the pot, including the bottom cut off, with a plastic bottle or a clear plastic bag. This helps retain moisture and create a humid environment. Place the covered pot in a shady spot with indirect light.
Planting Azaleas in Front of the House
When you are planning to plant azaleas in front of your house, you need a proper location for them to grow. Look for a place around your home that is fairly exposed to sunlight. Also, the place should have a layer of shade.
Observe how the sun moves across your front garden to find an ideal location. Azaleas grow well when they are planted under partial shade, such as under a tall tree. Make sure the soil in your garden is acidic in nature.
Avoid wet or clay-heavy areas. These can contribute to poor root growth or root rot. Moreover, choose an azalea type that best suits your front garden’s aesthetic. This will not only enhance the look of your home but also bring liveliness to your garden.
Final Thoughts
Thus far, you have learned how to plant azalea bushes anywhere: in the ground, in pots, or in clay soils. Azalea is a versatile plant that brightens many yards each spring. They are not really difficult to plant and grow as long as you give them proper care and growing conditions.
FAQs
1. How to plant azaleas in clay soil?
First of all, choose azalea varieties that are adaptable to clay soil conditions. Clay soil tends to have poor drainage with low acidic levels. You can add Sulphur or organic matter to acidify the soil.
You might need to create a raised bed to improve drainage. Also, consider adding sand or fine gravel to improve drainage. When the soil is ready to plant, plant the azalea a bit higher (1 to 2 inches) than the grade.
2. How far apart should to plant azaleas?
When you are planting more azalea bushes together, it is important to consider how far apart you should plant them. Ideally, you should space them 2-6 feet apart, depending on the plant’s mature spread.
3. Are azaleas high maintenance?
Azaleas are not high maintenance. Like other flowering shrubs, they require routine trimming, watering, mulching, and fertilizing. Above all, it requires the right amount of sunlight for healthy growth.
4. When do azaleas bloom?
Azaleas typically bloom in spring, from late March to mid-May, depending on the variety and local climate. They flower earlier in warmer regions and later in cooler areas. Some types even rebloom in fall, especially in warmer zones. Bloom duration usually lasts about two weeks, but it can vary by weather conditions. For continuous blooms, planting different varieties with staggered bloom times is recommended.